
지금까지 파이썬 설치와 개발환경 설정, Bing과 Google API 셋팅 및 사용을 위한 사용자 등록과 권한설정까지 완료하였습니다. 지금부터는 파이썬을 활용하여 어떻게 API를 컨트롤하고 사용하지는 알아보겠습니다.

블로그스팟 원클릭 검색엔진 색인요청 #7 - Google과 Bing API사용을 위한 파이썬 설정
Google과 Bing API사용을 위한 파이썬 설정
구글서치콘솔과 빙 웹마스터 API를 사용하기 위해 각 서치엔진에서 API 키 생성 및 설정까지 완료하였습니다.
지금부터는 각 API를 사용하기 위한 파이썬 설정에 대해서 설명드리도록 하겠습니다.
패키지는 아래와 같이 Visual Code의 TERMINAL에서 설치하시면 됩니다.

1) Pyqt5와 Qt Designer 설치
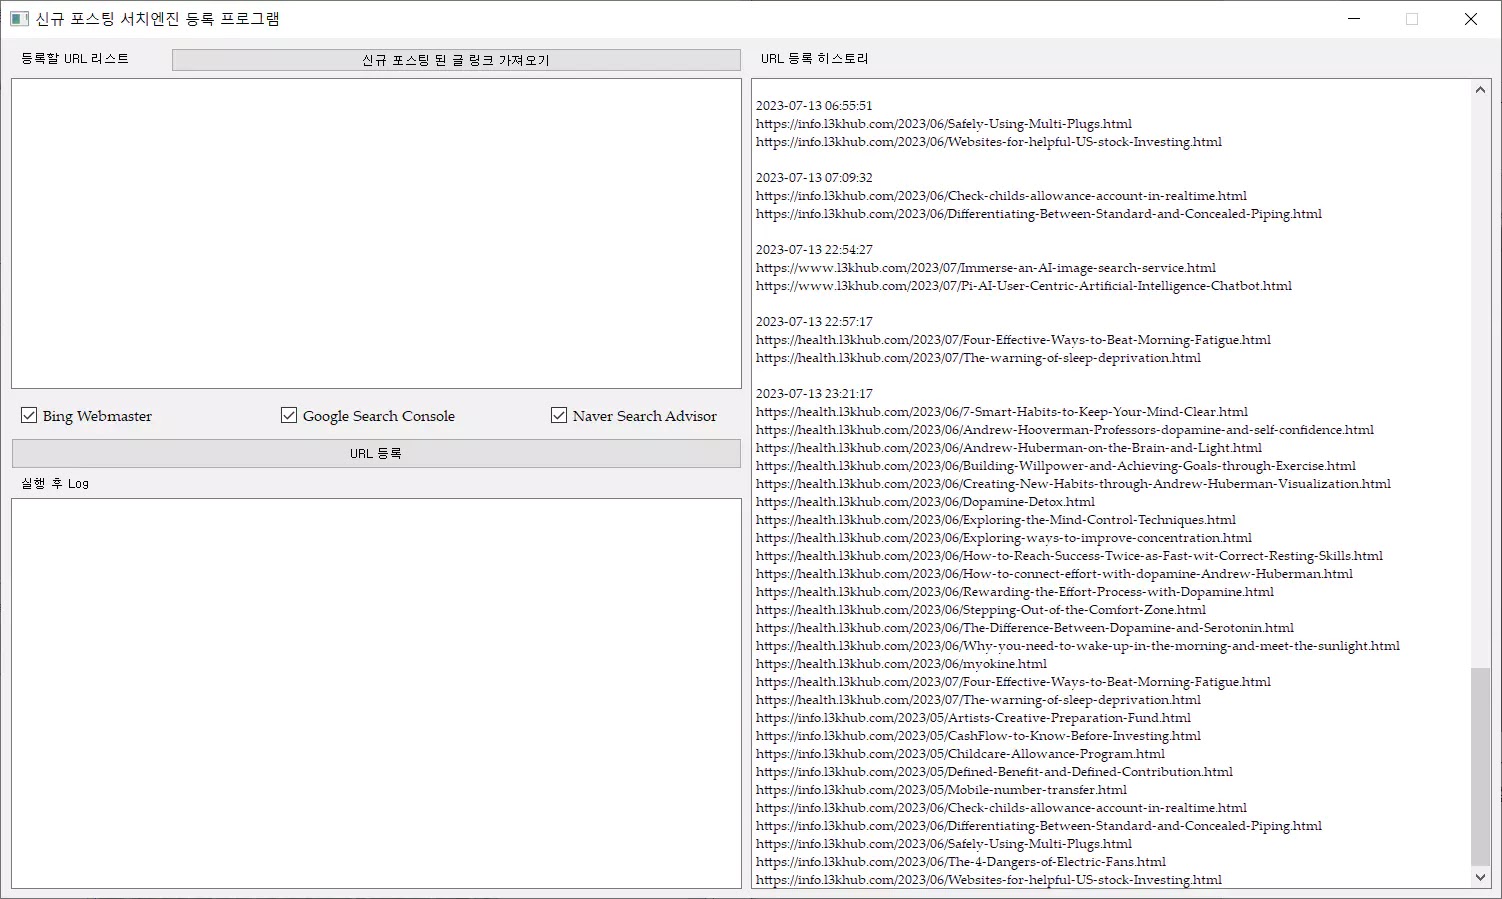
다음과 같은 화면을 만들기 위해서 pyqt5와 Qt Designer를 설치합니다.
- pip install pyqt5
- pip install Pyside6
설치가 완료되었다면 아래 폴더로 이동해서 designer.exe 를 실행합니다.

designer.exe 가 설치된 폴더로 이동해서 실행하면 아래와 같이 UI를 디자인할 수 있는 창이 열리는데 여기서 원하는데로 화면을 변경하실 수 있습니다.

제가 designer를 사용해 디자인한 auto-submit.ut 소스는 아래와 같습니다.
<?xml version="1.0" encoding="UTF-8"?>
<ui version="4.0">
 <class>Dialog</class>
 <widget class="QDialog" name="Dialog">
  <property name="geometry">
   <rect>
    <x>0</x>
    <y>0</y>
    <width>1500</width>
    <height>860</height>
   </rect>
  </property>
  <property name="sizePolicy">
   <sizepolicy hsizetype="Fixed" vsizetype="Fixed">
    <horstretch>0</horstretch>
    <verstretch>0</verstretch>
   </sizepolicy>
  </property>
  <property name="windowTitle">
   <string>신규 포스팅 서치엔진 등록 프로그램</string>
  </property>
  <widget class="QLabel" name="label">
   <property name="geometry">
    <rect>
     <x>20</x>
     <y>0</y>
     <width>151</width>
     <height>41</height>
    </rect>
   </property>
   <property name="font">
    <font>
     <family>돋움</family>
     <pointsize>8</pointsize>
    </font>
   </property>
   <property name="text">
    <string>등록할 URL 리스트 </string>
   </property>
  </widget>
  <widget class="QPushButton" name="btn1">
   <property name="geometry">
    <rect>
     <x>170</x>
     <y>10</y>
     <width>571</width>
     <height>24</height>
    </rect>
   </property>
   <property name="font">
    <font>
     <family>돋움</family>
     <pointsize>8</pointsize>
    </font>
   </property>
   <property name="text">
    <string>신규 포스팅 된 글 링크 가져오기</string>
   </property>
  </widget>
  <widget class="QCheckBox" name="chk1">
   <property name="geometry">
    <rect>
     <x>20</x>
     <y>367</y>
     <width>201</width>
     <height>20</height>
    </rect>
   </property>
   <property name="font">
    <font>
     <family>Palatino Linotype</family>
    </font>
   </property>
   <property name="text">
    <string>Bing Webmaster</string>
   </property>
   <property name="checked">
    <bool>true</bool>
   </property>
  </widget>
  <widget class="QCheckBox" name="chk2">
   <property name="geometry">
    <rect>
     <x>280</x>
     <y>367</y>
     <width>181</width>
     <height>20</height>
    </rect>
   </property>
   <property name="font">
    <font>
     <family>Palatino Linotype</family>
    </font>
   </property>
   <property name="text">
    <string>Google Search Console</string>
   </property>
   <property name="checked">
    <bool>true</bool>
   </property>
  </widget>
  <widget class="QCheckBox" name="chk3">
   <property name="geometry">
    <rect>
     <x>550</x>
     <y>367</y>
     <width>191</width>
     <height>20</height>
    </rect>
   </property>
   <property name="font">
    <font>
     <family>Palatino Linotype</family>
    </font>
   </property>
   <property name="text">
    <string>Naver Search Advisor</string>
   </property>
   <property name="checked">
    <bool>true</bool>
   </property>
  </widget>
  <widget class="QTextEdit" name="text2">
   <property name="geometry">
    <rect>
     <x>750</x>
     <y>40</y>
     <width>741</width>
     <height>811</height>
    </rect>
   </property>
   <property name="font">
    <font>
     <family>Palatino Linotype</family>
     <pointsize>8</pointsize>
    </font>
   </property>
   <property name="readOnly">
    <bool>true</bool>
   </property>
  </widget>
  <widget class="QLabel" name="label_2">
   <property name="geometry">
    <rect>
     <x>760</x>
     <y>0</y>
     <width>261</width>
     <height>41</height>
    </rect>
   </property>
   <property name="font">
    <font>
     <family>돋움</family>
     <pointsize>8</pointsize>
    </font>
   </property>
   <property name="text">
    <string>URL 등록 히스토리</string>
   </property>
  </widget>
  <widget class="QPushButton" name="btn2">
   <property name="geometry">
    <rect>
     <x>10</x>
     <y>400</y>
     <width>731</width>
     <height>31</height>
    </rect>
   </property>
   <property name="font">
    <font>
     <family>돋움</family>
     <pointsize>8</pointsize>
    </font>
   </property>
   <property name="text">
    <string>URL 등록</string>
   </property>
  </widget>
  <widget class="QTextEdit" name="text3">
   <property name="enabled">
    <bool>true</bool>
   </property>
   <property name="geometry">
    <rect>
     <x>10</x>
     <y>460</y>
     <width>731</width>
     <height>391</height>
    </rect>
   </property>
   <property name="font">
    <font>
     <family>Palatino Linotype</family>
     <pointsize>8</pointsize>
    </font>
   </property>
   <property name="readOnly">
    <bool>true</bool>
   </property>
  </widget>
  <widget class="QLabel" name="label_3">
   <property name="geometry">
    <rect>
     <x>20</x>
     <y>430</y>
     <width>291</width>
     <height>31</height>
    </rect>
   </property>
   <property name="font">
    <font>
     <family>돋움</family>
     <pointsize>8</pointsize>
    </font>
   </property>
   <property name="text">
    <string>실행 후 Log</string>
   </property>
  </widget>
  <widget class="QTextEdit" name="text1">
   <property name="geometry">
    <rect>
     <x>10</x>
     <y>40</y>
     <width>731</width>
     <height>311</height>
    </rect>
   </property>
   <property name="font">
    <font>
     <family>Palatino Linotype</family>
    </font>
   </property>
  </widget>
 </widget>
 <resources/>
 <connections/>
</ui>
2) 구글 서치 콘솔 관련 패키지 설치
구글 서치 콘솔 API를 사용하기 아래 패키지를 설치합니다.
- pip install google-api-python-client
다음으로 구글 Blogger API를 사용하기 위해 아래 패키지를 설치합니다.
- pip install --upgrade google-auth google-auth-oauthlib google-auth-httplib2 google-api-python-client oauthlib


